Introduction #
Outfy’s SmartQ feature lets you automate the creation and sharing of collage posts across your connected social media networks. Save time, stay consistent, and keep your audience engaged — without posting manually every day.
Note: You must be logged into outfy.com and have your networks connected before setting up SmartQ automation.
Log in to Outfy #
Visit outfy.com and log in to your account.
Go to SmartQ #
From the left-hand menu, click on SmartQ.
- You’ll see any previously created SmartQ tasks listed here.
- To create a new one, click Create New SmartQ in the top-right corner.
Fill in SmartQ Details #
You’ll land on the SmartQ Status setup page. Fill in the required fields:
Task Name
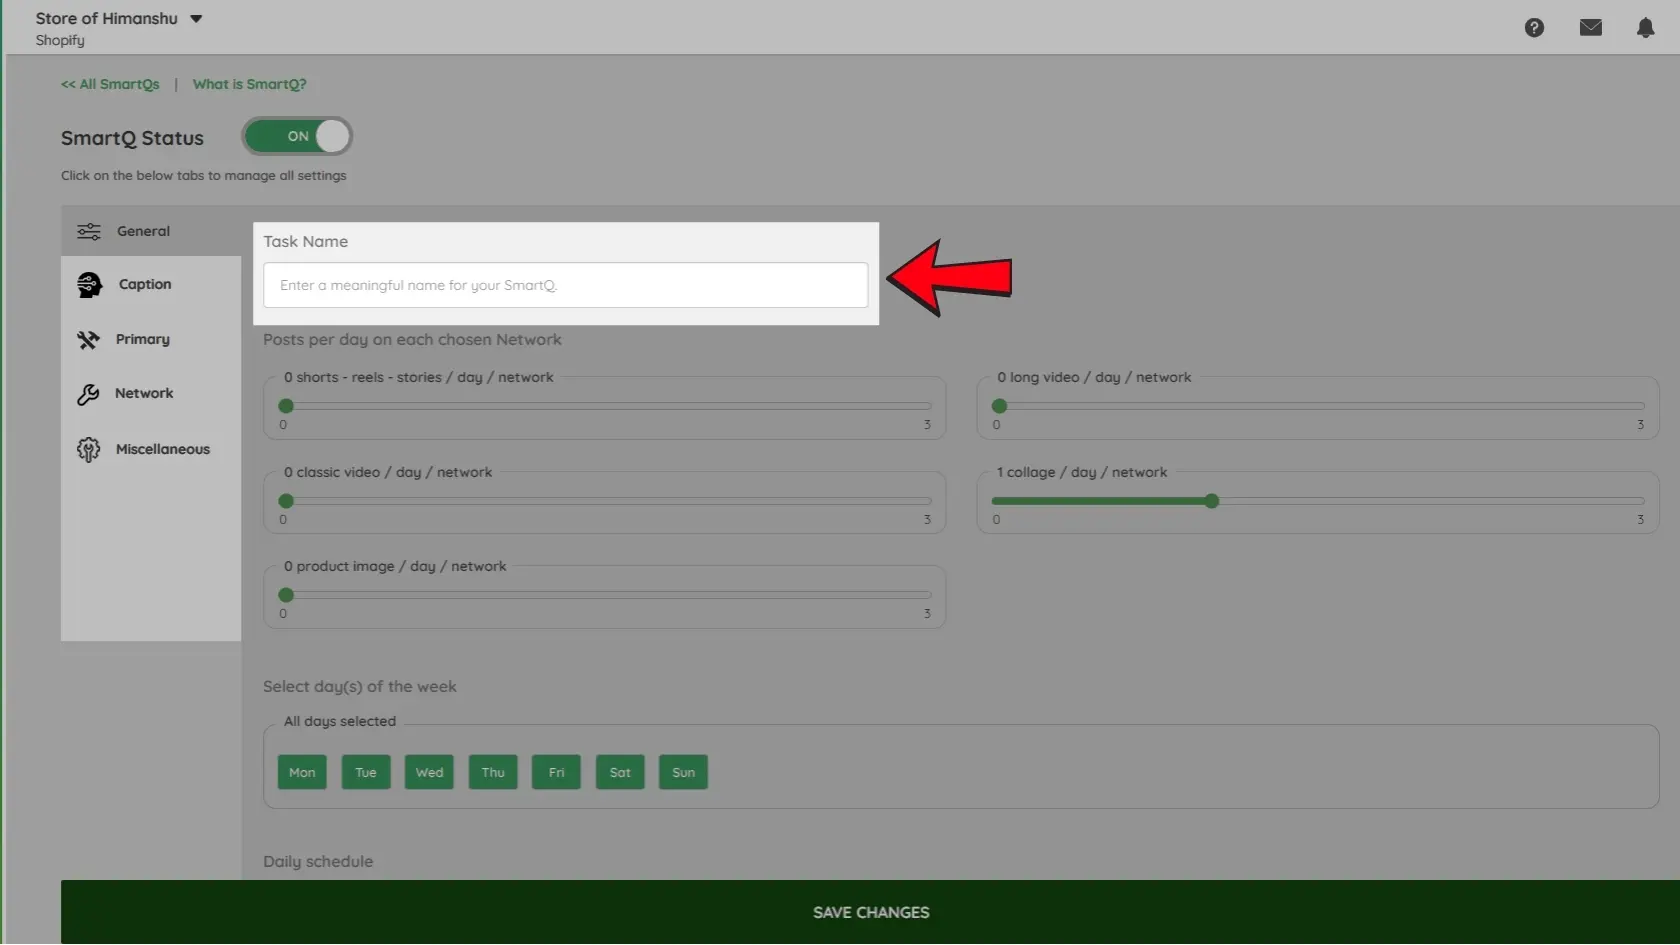
Give your automation a name to easily identify it later.
For example: Weekly Collage Promo, New Arrivals Campaign, or Daily Deals.
This name is just for your reference and helps you manage multiple SmartQ tasks.
Number of Collages to Post Per Day
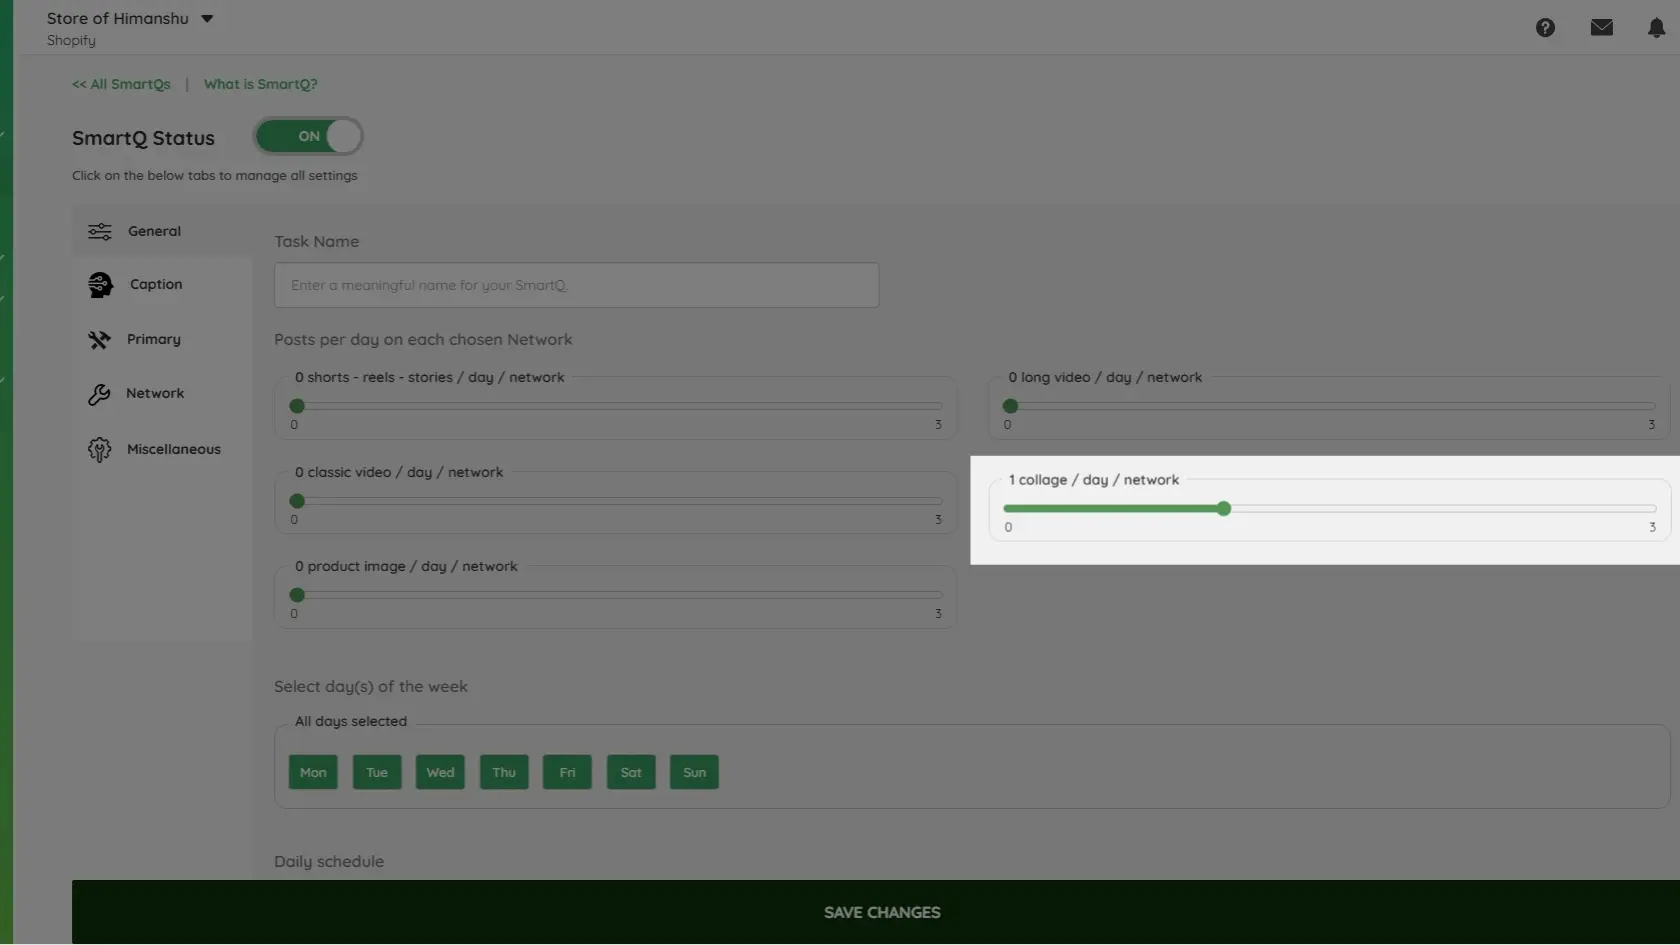
Choose how many collage posts you want SmartQ to create and share per day.
Note: You can automate up to 3 collage posts per day per network. For example, if you’ve selected 3 platforms, SmartQ can post up to 9 collages per day (3 on each).
If you’re looking to automate other types of content like videos or carousels, check here for more options.
Select Days for Posting
Choose the days of the week when you want your collage posts to go live.
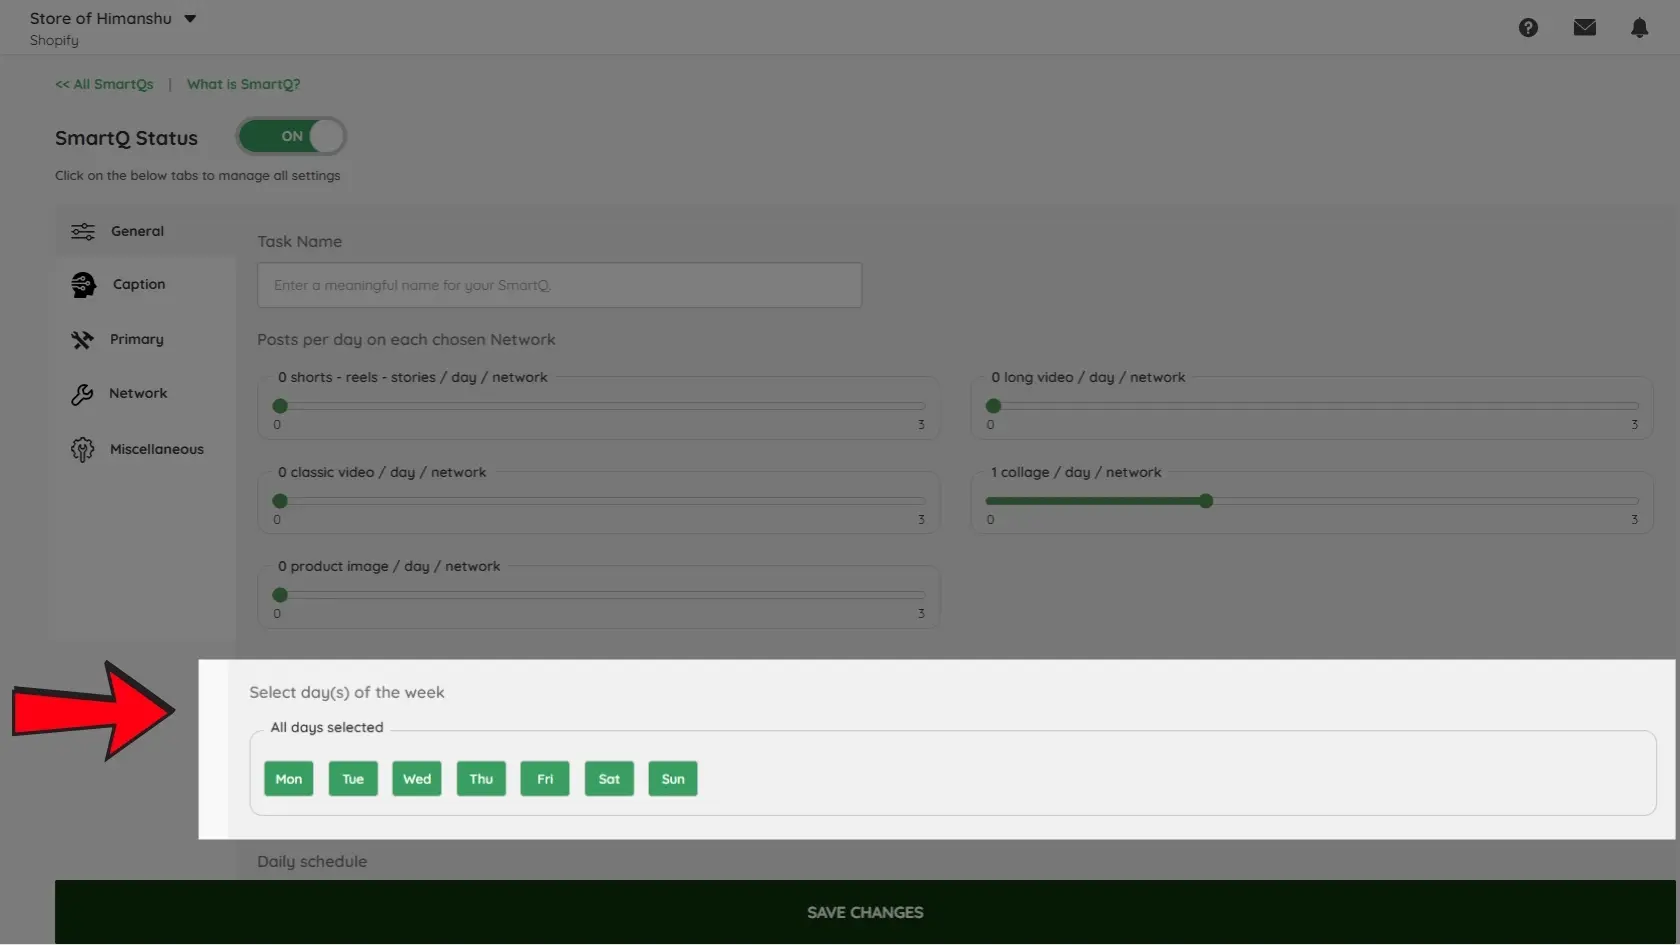
- You can select all 7 days for daily posting.
- Or choose specific days like Monday, Wednesday, and Friday for targeted campaigns.
This helps you control the frequency and timing of your social media activity.
Set Daily Schedule
Choose the time range during which SmartQ should post your collages.
You can set a start time and end time—for example, from 9:00 AM to 9:00 PM.
Only posts scheduled within this time window will be published.
You can also select your preferred time zone. By default, Outfy uses the time zone set in your profile, but you can change it here if needed.
Caption Settings #
Choose how your captions will be generated.
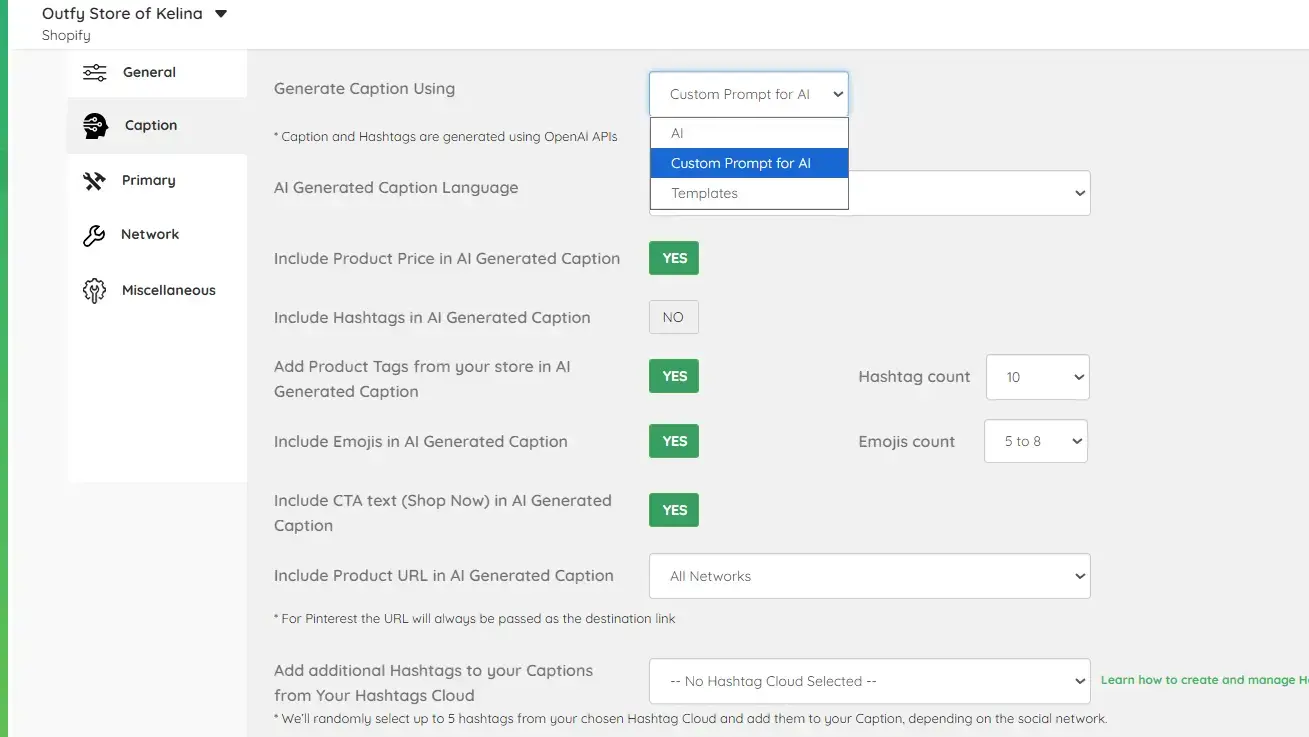
You can either use AI-generated captions powered by OpenAI, let Outfy use predefined templates, or create your own captions using the new Custom Prompt for AI option.
Note: For detailed instructions on all available caption settings and options, check our complete guide here.
Primary Settings #
This step helps you control which products to post and how your collages will appear visually.
Select Categories
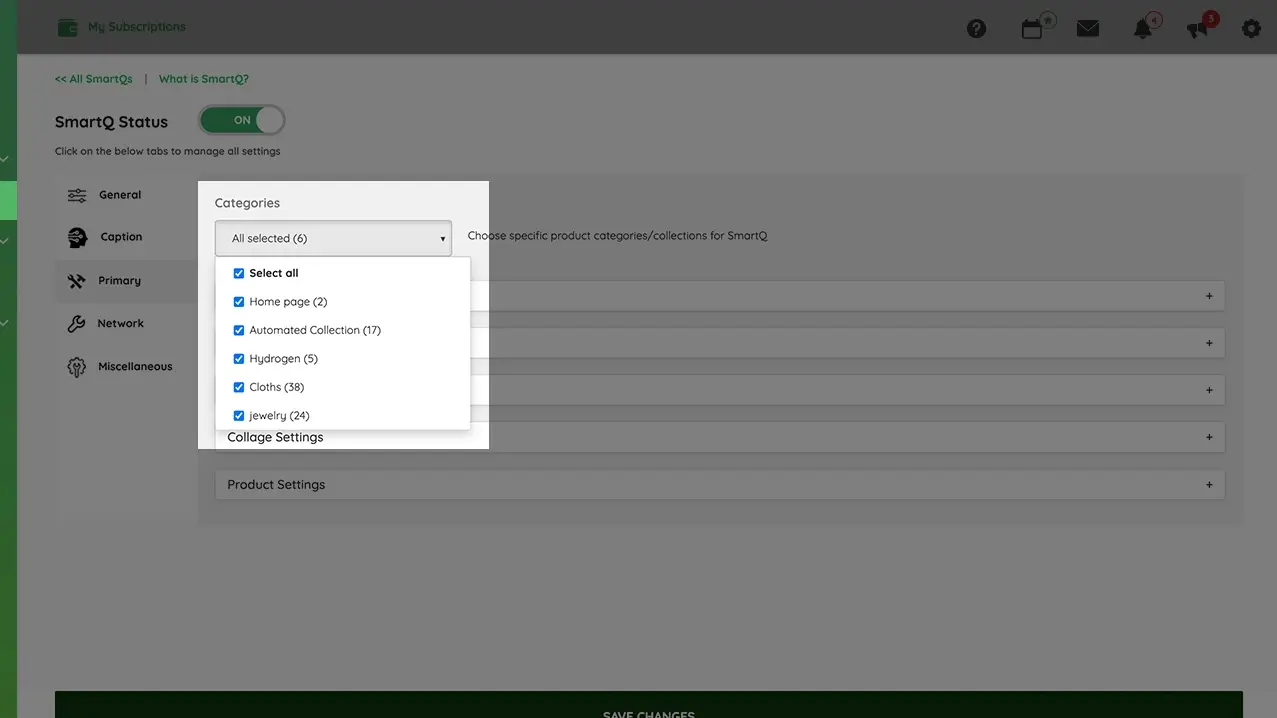
Decide which product categories SmartQ should pull content from:
- Click on the dropdown menu to view and select your product categories.
- You can include one or multiple categories depending on what you want to promote.
- Only products from the selected categories will be used for creating and posting collages.
Collage Settings
Customize the look of your collage posts.
1. Template Layout
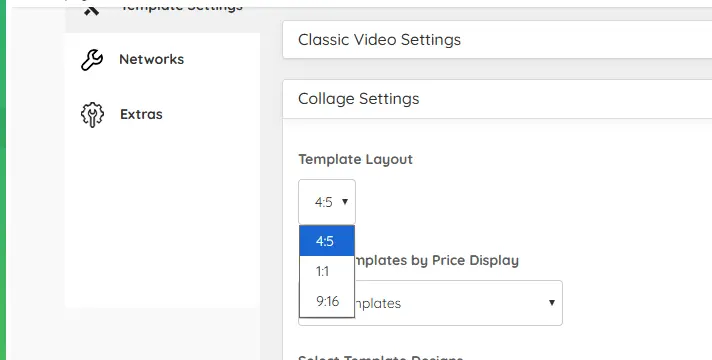
Choose the aspect ratio for your collages (for example: 4:5, 1:1,9:16 etc.).
This helps optimise your posts for different social platforms like Instagram, Facebook, and Pinterest.
2. Filter Templates by Price Display

Use this dropdown to filter templates based on how prices are shown:
- All Templates
- Templates that show Product Price
- Templates Without Price
This helps you quickly select designs that match your pricing preference.
3. Select Template Designs
Choose which collage templates you want to use.
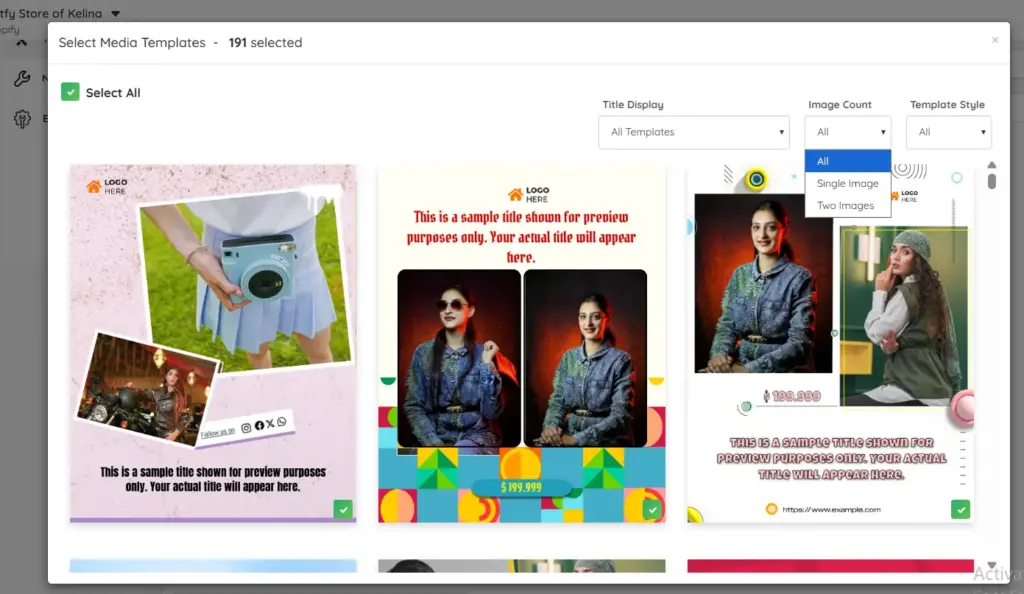
- You can select all templates or only specific ones.
- The number of selected templates is shown (e.g., All selected (193)).
4. Show your Store Logo in Collages
Decide whether your store logo should appear in your collages.
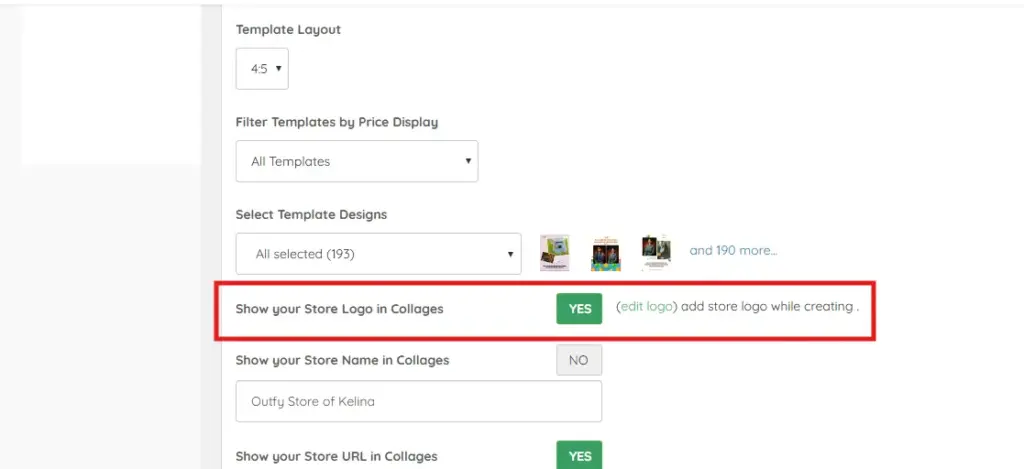
- YES – Logo will be added to the collage.
- NO – Logo will not be shown.
You can click (edit logo) to upload or change your logo.
5. Store Branding & Contact Details in Collages
Manage all your store information that appears on collages from one place.
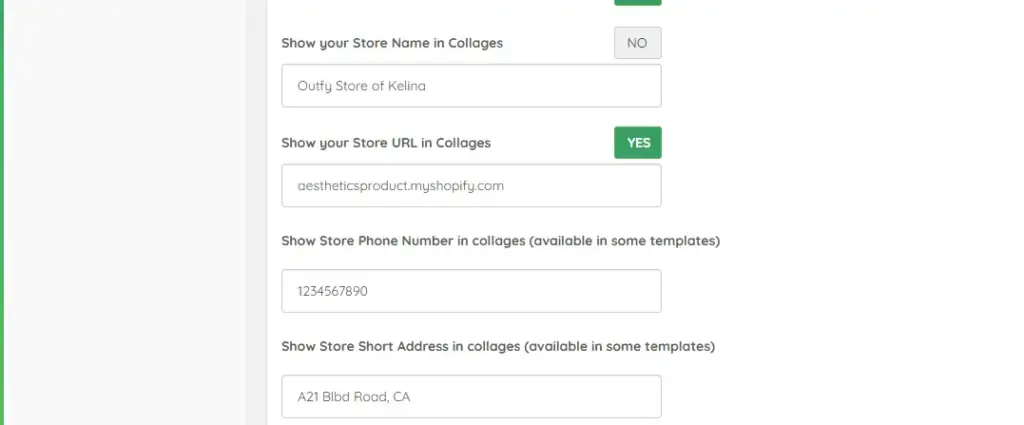
- Show your Store Logo in Collages
Enable YES/NO to display your logo.
Click (edit logo) to upload, change, or adjust your logo. - Show your Store Name in Collages
Toggle YES/NO and enter your store name (e.g., Outfy Store of Kelina). - Show your Store URL in Collages
Toggle YES/NO and add your shop link (e.g.,aestheticsproduct.myshopify.com).
Make sure it points to the correct store or landing page. - Show Store Phone Number in Collages (available in some templates)
Add your contact number if you want it displayed. - Show Store Short Address in Collages (available in some templates)
Add a short business address like:A21 Blvd Road, CA.
This section helps you fully brand your collages and make them more professional and informative.
Network Settings #
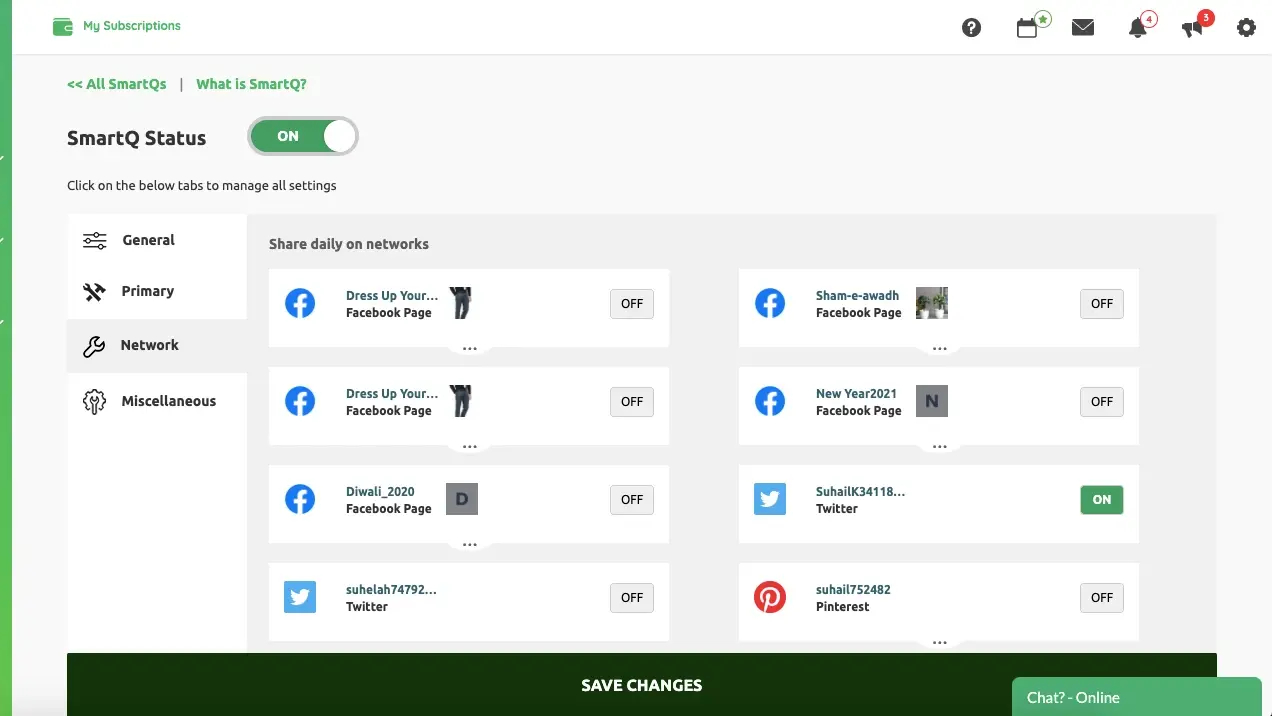
Choose the platforms where you want to post.
Deselect any network you don’t want included in this automation.
Miscellaneous Settings #
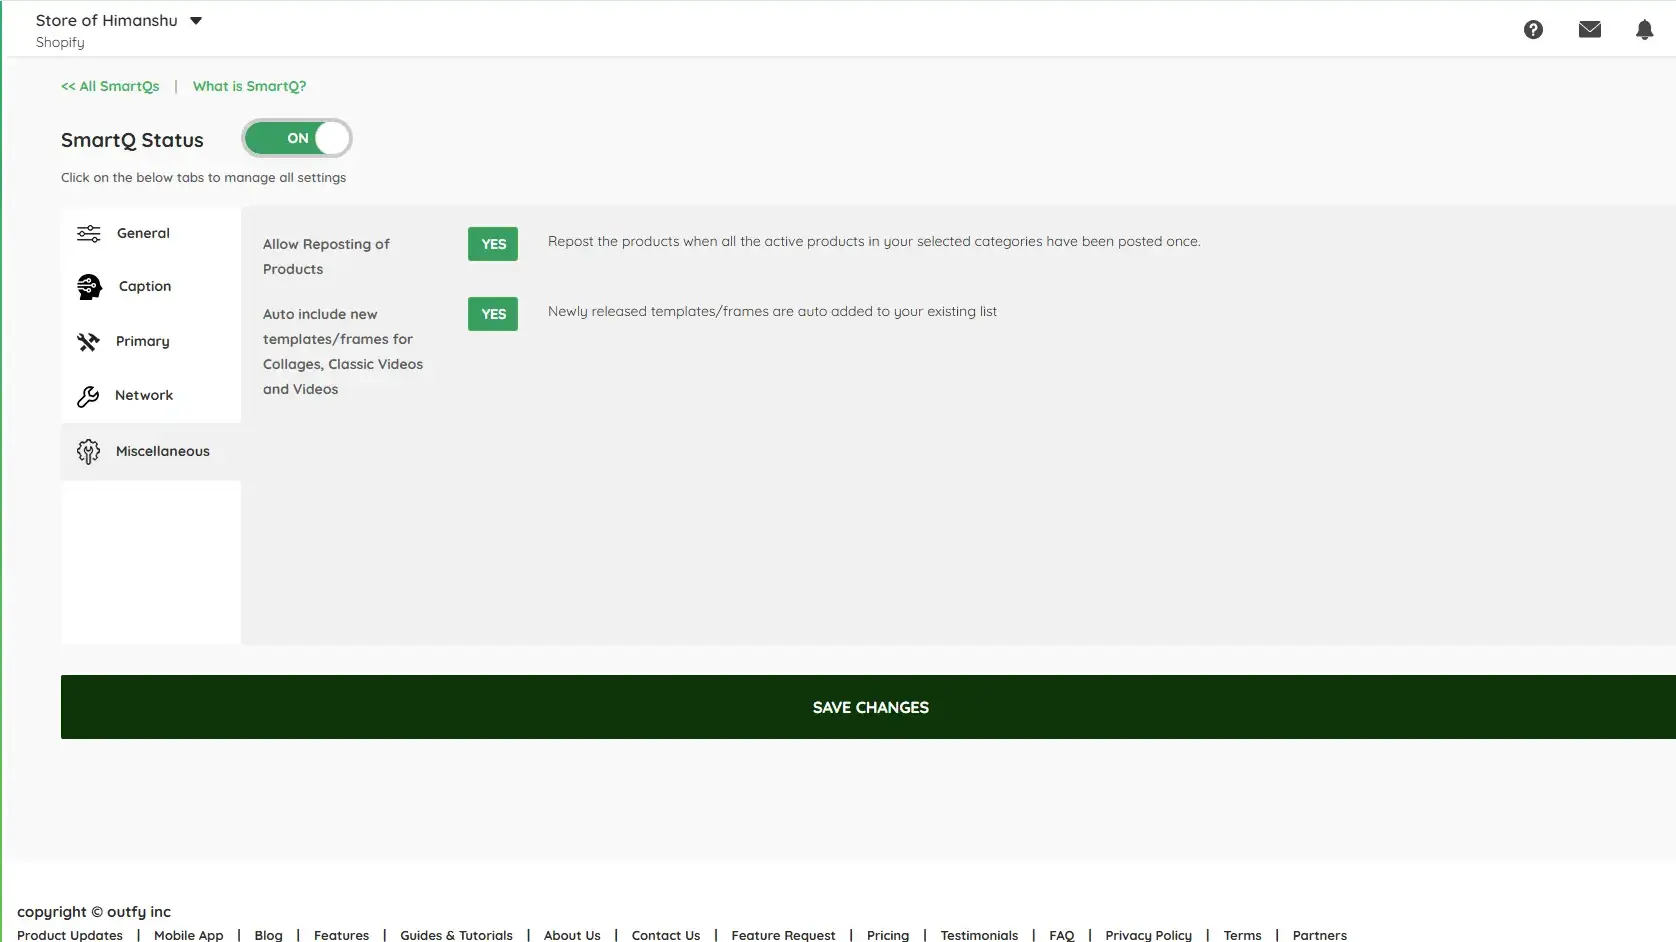
- Allow Reposting of Products
- Auto-Include New Templates: Decide whether to add new templates/frames for Collages, Classic Videos, and Long Videos automatically.
Save Your Task #
Once all settings are configured, click Save Changes.
That’s it! Your Long Video automation is now active and will run based on your schedule.